Alert on detections
You want to be notified when your camera detects something specific – a person in a restricted area, a missing hard hat, or an anomaly on a production line. This guide shows you how to connect your vision service to Viam’s trigger system so you receive an email or webhook whenever a detection occurs. No custom code is required.
Concepts
The alert pipeline
The alert system chains three resources together:
- Filtered camera – a camera module that only passes images to the data management service when specific detections or classifications are present.
- Data management service – captures images from the filtered camera and syncs them to the Viam cloud.
- Trigger – fires when new data syncs, sending an email or webhook notification.
Because the filtered camera only passes images that match your criteria, every synced image represents a detection event. The trigger fires on each sync, turning data events into alerts.
Filtered camera behavior
The filtered-camera module wraps an existing camera and applies a vision service as a filter. It functions as a normal camera for live viewing and API calls. The filtering only affects what gets captured by the data management service.
You configure the filter with:
- A label – the detection or classification class name to look for (such as “Person” or “NO-Hardhat”).
- A confidence threshold (0.0-1.0) – the minimum confidence score required. Only images where the model meets this threshold are captured.
Alert frequency
Triggers support configurable notification frequency to prevent alert fatigue. For example, you can limit alerts to a maximum of one per hour even if detections occur continuously.
Steps
1. Configure a filtered camera
Add the filtered camera module to your machine:
Navigate to your machine’s CONFIGURE tab.
Click + and select Configuration block.
Search for filtered-camera and select it.
Click Add component, name it
objectfilter-cam, and click Add component again to confirm.Add configuration attributes:
Replace
<camera_name>and<vision_service_name>with the names of your camera and vision service. Choose eitherobjects(for bounding-box detections) orclassifications(for image-level labels) and remove the other.{ "camera": "<camera_name>", "vision_services": [ { "vision": "<vision_service_name>", "classifications": { "<label>": 0.5 }, "objects": { "<label>": 0.5 } } ] }This example uses a YOLOv8 model named
yoloto detect workers without hard hats:{ "camera": "my_webcam", "vision_services": [ { "vision": "yolo", "objects": { "NO-Hardhat": 0.6 } } ] }Click Save.
For more details, see the filtered-camera module README.
Tip
To verify your confidence threshold, expand the TEST panel on your vision service card and observe the confidence levels for live detections.
2. Configure data capture and sync
Add the data management service to capture and sync filtered images:
- Click + and select Configuration block.
- Search for data management and select it.
- Click Add component, name it
data-manager, and click Add component again to confirm. - Leave the default attributes and click Save.
Enable data capture on the filtered camera:
- Locate the
objectfilter-campanel. - Click the Data Capture button.
- Select GetImages as the type.
- Set the capture frequency to
0.2images per second (one image every 5 seconds). Adjust as needed for your use case.
3. Configure a trigger
Add a trigger to send alerts when filtered images sync:
Click + in the left sidebar and select Trigger.
Enter a name and click Create.
Set Type to Data has been synced to the cloud.
Set Data Types to Binary (image).
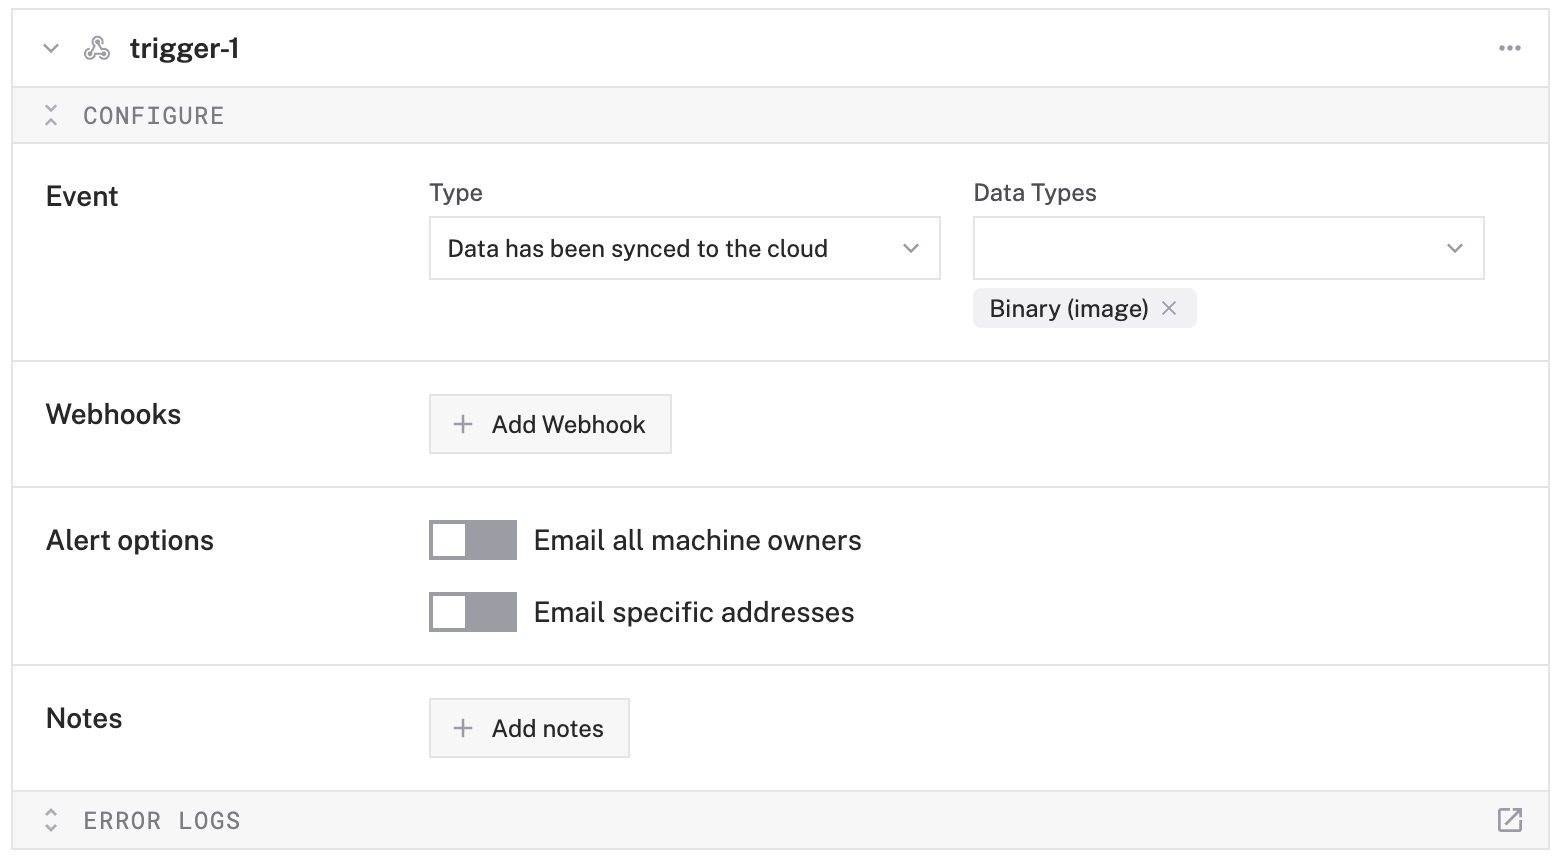
Add notification methods:
Email specific addresses: Toggle on, add email addresses, and set the alert frequency.
Email all machine owners: Toggle on and set the alert frequency.
Webhook: Click Add Webhook, enter the URL of your cloud function, and implement logic to process the webhook payload. Use this to integrate with external services like Twilio, PagerDuty, or Zapier.
Set the notification frequency (for example, maximum one alert per hour).
Click Save.

Try It
- Point your camera at an object your model recognizes and wait for the capture interval to pass.
- Check the TEST panel on your vision service to confirm detections are occurring with sufficient confidence.
- Navigate to the DATA tab and verify that images are syncing.
- Check your email or webhook endpoint for the alert.
Troubleshooting
What’s Next
- Act on Detections – build a module that responds to vision results in real time.
- Triggers Reference – full documentation for trigger types, webhook payloads, and configuration options.
- Capture and Sync Data – learn more about configuring data capture and sync intervals.
Was this page helpful?
Glad to hear it! If you have any other feedback please let us know:
We're sorry about that. To help us improve, please tell us what we can do better:
Thank you!